Metal Detector Discrimination (and Notch Discrimination) Settings Explained

Written by Piotr Lesniewski
Detectorist • Scotland
As an Amazon Associate we earn commission from qualifying purchases. Read our full Affiliate Disclosure.
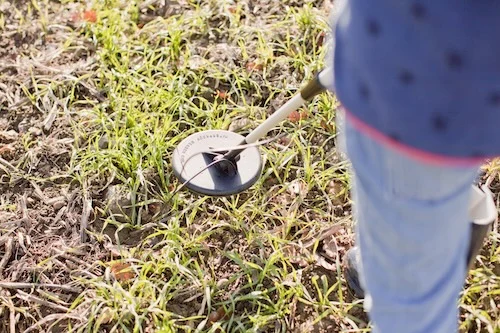
You’ve probably experienced the frustration of digging up countless bottle caps and nails during your metal detecting adventures. That’s where discrimination settings come into play—they’re your filter against unwanted targets. But how do you balance filtering out trash without missing valuable finds?
Understanding both standard and notch discrimination can transform your treasure hunting efficiency, helping you focus on what matters.
Let’s explore how these critical settings actually work.
Key Takeaways
- Discrimination settings filter unwanted metals by analyzing conductivity, helping detectorists focus on valuable finds while ignoring common trash items.
- Notch discrimination allows selective acceptance or rejection of specific metal types on the Target ID scale, creating customizable filtering for precise hunting.
- High discrimination settings can miss valuable items like small gold jewelry, which share conductive properties with common trash items.
- High discrimination settings can miss valuable items like small gold jewelry, which share conductive properties with common trash items.
- High discrimination settings can miss valuable items like small gold jewelry, which share conductive properties with common trash items.

What is Metal Detector Discrimination Setting?
Discrimination, a cornerstone feature of modern metal detectors, allows you to filter out unwanted targets while searching. This function works by analyzing the electrical conductivity properties of metals in the ground and giving you control over which signals your detector responds to.
When you set discrimination levels, you’re essentially instructing your detector to ignore certain types of metals. Your machine measures how electricity flows through each target and compares it to your settings.
Items with conductivity outside your selected range won’t trigger an audio response. This capability helps you avoid wasting time on items like pull tabs, bottle caps, or iron debris.
Instead, you’ll hear signals only from potentially valuable finds that match your discrimination profile, making your detecting sessions more productive and enjoyable.

What is Metal Detector Notch Discrimination Setting?
Taking metal detecting precision to the next level, notch discrimination offers a more sophisticated approach than standard discrimination settings.
Instead of simply rejecting everything below a certain conductivity threshold, notch discrimination lets you selectively accept or reject specific segments along the detector’s Target ID scale.
With notch discrimination, you can create customized “notches” that target particular metal types while preserving others. For example, you’ll be able to reject the narrow range commonly associated with ring pulls while still accepting valuable targets that register just above or below that range.
This refined filtering system provides you with greater control over what your detector responds to, allowing for more productive hunting sessions by filtering out specific nuisance items without missing potential treasures.
Why is Metal Detecting Discrimination Setting Important?
The value of discrimination settings in metal detecting can’t be overstated when you’re sifting through sites littered with modern trash. Instead of spending your day digging up countless bottle caps, nails, and pieces of aluminum foil, you’ll save time and energy by filtering out these unwanted targets.
By utilizing discrimination effectively, you’ll transform frustrating hunts into productive ones. You’ll dig fewer holes and focus on signals that are more likely to be valuable or historically significant. This becomes especially important when you’re detecting in high-traffic areas like public parks where modern debris is abundant.
Additionally, discrimination settings allow you to customize your hunt based on specific goals. If you’re specifically searching for coins, you can adjust your settings to ignore most other metals, making your detecting sessions more targeted and rewarding.

However Risk of Missing Good Targets
While discrimination settings can save you time and effort, they present a significant risk of missing valuable finds. Setting your discrimination too high can cause you to overlook desirable items that share conductive properties with common junk.
Many precious targets read similarly to trash items on your detector. Small or low-karat gold often registers like aluminum foil or pull-tabs. Thin silver coins mightn’t trigger the response you’d expect from silver. Various relics and ancient bronze coins frequently produce low conductivity readings that your detector might filter out.
You’ll need to balance efficiency against thoroughness. Consider running with lower discrimination settings in historically significant areas or locations where fine jewelry might be found.
How Does Metal Detector Discrimination Setting Work?
Discrimination settings function as your metal detector’s filtering system, allowing you to sort desired targets from unwanted junk. This feature works by analyzing the conductivity of objects you encounter in the field.
When your detector sweeps over a target, it measures the item’s conductivity and assigns it a specific value—this becomes your Target ID.
Your discrimination setting establishes rejection points along this conductivity scale. Any object whose conductivity falls within these rejected ranges triggers your detector to respond differently than it would for accepted targets.
You’ll notice this filtering in action when your detector either remains silent when passing over rejected items, produces a distinctive “rejection” tone (often a grunt or broken signal), or simply fails to display a Target ID for objects you’ve chosen to discriminate against.

Types of Discrimination
When setting up your metal detector, you’ll encounter two main discrimination types: Linear/Standard and Notch Discrimination.
Linear Discrimination (often labeled simply as “DISC”) allows you to reject all metals below a certain threshold on the conductivity scale.
Notch Discrimination offers more precision by letting you accept or reject specific segments of the conductivity range, effectively creating “windows” of detection.

Linear/Standard Discrimination (often just “Discrimination” or “DISC”)
The backbone of most metal detector filtering systems, linear discrimination creates a clear boundary between wanted and unwanted targets. It works on a simple principle: as you increase the discrimination level, you’re establishing a rejection threshold on the conductivity scale.
Your detector begins by filtering out low-conductivity ferrous objects like iron. As you turn the dial higher, it progressively rejects materials further up the conductivity spectrum. First comes small foil, then larger aluminum pieces, followed by items in the nickel range (which might include some gold), then pull-tabs and beyond.
Think of it as drawing a line in the sand—anything below that line gets ignored while targets above remain audible. This straightforward approach lets you quickly eliminate common trash items while hunting.

Notch Discrimination
Unlike the broad-strokes approach of linear discrimination, notch discrimination provides precision targeting capabilities for specific trash items.
It works like a surgical tool, allowing you to reject very specific Target ID ranges while keeping everything else active.
You’ll appreciate notch discrimination when dealing with predictable nuisance targets. For example, if modern ring pulls consistently register between 45-50 on your detector, you can “notch out” just that narrow segment while still detecting valuable items above and below that range.
Depending on your detector model, you might’ve access to preset notch patterns for common trash items, or you can create your own custom patterns.
This targeted approach helps you maximize your finds while minimizing unwanted digging, giving you more control over what signals deserve your attention.
When To Use Discrimination
Deciding whether to crank up your discrimination requires careful consideration of your detecting goals and environment.
For metal detecting beginners, it’s best to start with minimal discrimination settings to learn how different targets respond on your detector. This approach lets you hear nearly everything and develop an ear for subtle differences between metals.
If you’re detecting in the UK or areas rich with historical artifacts, keeping discrimination low helps ensure you don’t miss valuable items that might register similarly to junk.
Begin with just enough discrimination to filter out small iron, or try the all-metal mode if you can manage the extra noise.
As you gain experience, you’ll develop a better sense of when to increase discrimination for specific hunting conditions or target types.

Adjusting for Clean Sites (e.g., remote pasture, some woodlands, beaches with little modern trash)
When detecting in pristine environments like remote pastures, secluded woodlands, or beaches far from tourist traffic, you’ll want to minimize discrimination or turn it off completely.
These “clean” beach sites typically contain fewer modern contaminants, so you can afford to dig more signals without wasting time on trash.
In these locations, even small iron objects might be historically significant artifacts like medieval nails, ancient tools, or military relics.
Faint signals could indicate deeply buried treasures or small valuable items like hammered coins or delicate rings that would otherwise be filtered out.
You’ll dig more targets using this approach, but the potential rewards outweigh the extra effort.
Running in all-metal mode or with minimal discrimination ensures you won’t miss potentially valuable finds that discrimination might reject.
Adjusting for Trashy Sites
Heavily contaminated sites require a strategic approach to discrimination settings that balances find potential with time efficiency. In these challenging environments, discrimination becomes more tempting and potentially useful.
When using linear discrimination, gradually increase the level until the most common junk signals are reduced. Be extremely cautious about setting it too high, as valuable targets might share similar properties with trash.
Notch discrimination offers a more targeted solution. If you can identify specific, consistent junk items by their Target ID—like distinctive ring pulls or shotgun cartridge ends—you can notch out just that small segment.
This preserves a broader range of potential good targets while eliminating your site’s most problematic trash signals.

How to Set Metal Detectors Discrimination Levels
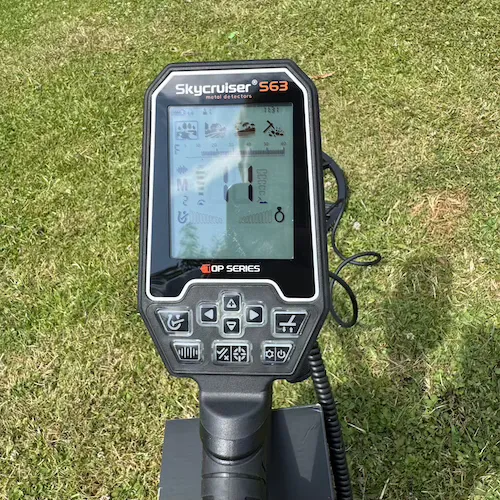
Setting proper discrimination levels on your metal detector starts with reviewing your owner’s manual for model-specific recommendations.
You’ll want to test known targets like iron nails, pull tabs, and coins to understand how your detector responds to different materials.
Adjust your settings based on your hunting goals—use high iron rejection for trashy urban sites, moderate discrimination for modern coin shooting, or minimal filtering when searching for historic relics.
Refer to your manual
Before attempting to adjust discrimination settings, consult your metal detector’s manual for specific guidance. Manufacturer documentation provides essential information tailored to your particular model, saving you time and frustration during setup.
Your manual will typically outline recommended discrimination levels for different hunting scenarios and environments.
Most importantly, it will provide the target ID ranges for various metals, helping you understand exactly what numbers correspond to iron, foil, pull tabs, gold, silver, and other materials.
These manufacturer-provided target ID ranges give you a solid foundation before you begin customizing settings.
Instead of guessing which numbers represent trash versus treasure, your manual offers a precise starting point that you can then adjust based on your hunting preferences and local conditions.
Test known targets
With your manual as a foundation, the next step involves hands-on learning with items you already know.
Create a small test garden or simply sweep various objects across your coil before heading to the field.
Collect an assortment of good targets (coins, gold jewelry, silver items) and common trash (nails, bottle caps, pull-tabs, aluminum foil) for your test.
Run each item across your detector at different discrimination settings, noting exactly when they’re accepted or rejected.
Pay close attention to the Target ID numbers displayed for each object.
This practice builds a mental database of how your specific detector responds to different metals.
You’ll quickly learn which settings reject unwanted items while preserving signals from valuable finds.
This hands-on calibration is invaluable knowledge that no manual alone can provide.
Iron Rejection
Iron rejection represents the first crucial discrimination decision you’ll face as a metal detectorist. Most detectorists choose to filter out small iron objects like nails, which significantly reduces false signals when hunting.
However, be cautious with this common setting. Large or oddly shaped iron objects can sometimes trick your detector into registering as non-ferrous metals, giving higher readings than expected. This means you might occasionally dig up iron despite your discrimination settings.
If you’re searching historic sites, consider adjusting your approach. Iron artifacts can hold historical significance and archaeological value at these locations.
In such cases, you might want to reduce your iron discrimination level to capture these potentially important finds, even if it means digging more targets.
Modern Coin Shooting
Most modern coin hunters rely on strategic discrimination settings to maximize their finds while minimizing wasted effort.
When you’re targeting contemporary coins, you’ll want to focus your detector on high-conductivity metals while filtering out less valuable items.
Set your discrimination to reject iron completely, as modern coins don’t contain this metal. You’ll also benefit from eliminating most aluminum foil and pull-tabs, which fall in the lower-to-mid conductivity range. These items often create frustrating false signals that waste your time.
Many detectors offer preset “coin” modes that automatically configure these settings. However, learning to fine-tune your discrimination manually gives you greater control in different hunting environments.
With practice, you’ll develop the perfect balance between rejecting trash and ensuring you don’t miss valuable coins with similar conductivity readings.
Relic Hunting
Unlike coin hunting, relic hunting requires a completely different approach to discrimination settings.
When searching for historical artifacts, you’ll want to use very low discrimination levels on your metal detector.
Many valuable relics are composed of iron, bronze, brass, lead, or pewter.
These materials produce a wide spectrum of Target IDs, meaning higher discrimination settings might cause you to miss significant finds.
Civil War buttons, medieval coins, ancient tools, and military artifacts often register similarly to items you’d normally filter out.

Gold Prospecting (with VLF detectors)
Gold prospecting with VLF detectors demands perhaps the most conservative approach to discrimination settings of all detecting activities.
Unlike coin or relic hunting where you might filter out certain targets, gold requires a completely different strategy.
Gold items typically register in the mid-to-low conductivity range on your detector, especially the smaller nuggets and rings you’re likely to encounter in the field.
This creates a significant challenge – using high discrimination settings will almost certainly mean you’ll miss these valuable finds.
Most successful prospectors operate in All-Metal mode or with minimal iron rejection settings.
By keeping discrimination at its lowest possible setting, you’ll ensure those small gold nuggets won’t be filtered out along with the trash metals.
You’ll dig more junk, but you won’t miss the gold.
The Dangers: Over-Discrimination and Masking:
Over-discriminating your metal detector can lead you to miss valuable targets as many relics and jewelry register in ranges similar to trash.
You’ll encounter “masking” when multiple targets lie close together, causing good finds to be rejected because they’re overwhelmed by nearby iron signals.
Setting your discrimination too high might seem efficient for eliminating junk, but you’re likely walking past historical artifacts and precious metals that could’ve been your best discoveries.
Missing Good Finds
While learning to use discrimination settings effectively, many detectorists fall into a dangerous trap that can cost them valuable finds.
The uncomfortable truth is that precious items often share Target ID ranges with common trash.
Your gold jewelry, Roman bronze coins, cut hammered silver, and thin-sectioned relics frequently register in the same ranges as foil, pull-tabs, and even some iron objects.
By aggressively notching out these “junk” ranges, you’re potentially eliminating treasure from your hunting experience.
Every time you walk a field with high discrimination settings, you’re making a critical trade-off.
You’ll dig fewer holes but risk missing historically significant or valuable items hiding in those “noisy” ranges.
Consider whether saving yourself from digging a few pull-tabs is worth potentially missing that ancient gold ring with the same signature.
The “Masking” Effect
Beyond missing individual targets, aggressive discrimination settings create a more insidious problem known as the “masking effect.”
When you’re hunting an area where trash and treasures lie in close proximity, the stronger signal from a rejected item (typically larger or shallower) can completely overwhelm and hide the signal from a valuable target nearby.
This means you’ll walk right past valuable finds without a single beep from your detector. The machine simply responds to the dominant trash signal and remains silent.
To combat this phenomenon, consider running with less discrimination or occasionally switching to All-Metal mode, especially in heavily hunted areas.
While you’ll dig more trash, you’ll also recover those masked treasures that others have missed.

Relationship with Other Metal Detectors Settings
Discrimination settings don’t work in isolation but interact with other key detector functions like Target ID, audio tones, sensitivity, and ground balance.
You’ll find that effective discrimination relies on proper Target ID interpretation and corresponding audio signals that help you identify targets without visual confirmation.
Your detector’s sensitivity and ground balance settings directly impact discrimination performance, as poorly adjusted levels can cause false signals or mask valuable finds.
Target ID & Audio Tones
Target ID and audio tones represent the core communication system between you and your metal detector, working in tandem with discrimination settings to filter what’s worth digging.
When you set discrimination patterns, you’re essentially instructing your detector which Target ID segments to ignore or accept.
Your primary feedback comes through audio signals. When your coil passes over a discriminated target, you’ll either hear nothing at all or a distinctive rejected tone—typically shorter and more abrupt than the clear, sustained sounds of accepted targets.
This audio feedback happens instantly, allowing you to make quick decisions while sweeping.
Understanding this relationship helps you interpret what’s happening beneath your coil without constantly checking the visual display, maintaining an efficient and productive hunting rhythm.
Sensitivity & Ground Balance
While discrimination settings filter what targets you hear, they can’t perform optimally unless sensitivity and ground balance are properly calibrated first.
These fundamental settings create the stable foundation upon which your discrimination features can effectively operate.
If your detector’s sensitivity is set too high or your ground balance is improperly adjusted, you’ll experience erratic signals and false readings.
This instability makes it nearly impossible to accurately discriminate between different metals or interpret the discrimination patterns you’re receiving.
Always establish proper sensitivity and ground balance before fine-tuning your discrimination settings.
You’ll need to recalibrate these baseline settings whenever soil conditions change significantly.
Remember that discrimination works best on a detector that’s stable and properly tuned to your hunting environment first.

Tips for Using Discrimination Effectively
To use discrimination effectively, you’ll need to spend time learning your specific detector’s response patterns and initially dig all questionable signals to build experience.
Test suspicious targets by performing the “wiggle test” and consider using features like “iron audio” or “tone roll” to better identify metals.
Don’t automatically skip iron signals, as valuable items sometimes hide beneath or alongside them, making what you might normally reject worth investigating.
Learn YOUR Metal Detector
Every metal detector has its own personality and quirks that you’ll need to master for optimal performance. This is especially true when it comes to discrimination settings.
Your detector’s Target ID system is unique – numbers, tones, and visual indicators will respond differently than other models. Take time to conduct controlled tests with known objects, observing how your machine registers various metals. Note how aluminum pull-tabs differ from gold rings, or how iron falsely reads as a valuable target at certain angles.
Experiment with discrimination levels in your yard before heading to crowded locations. Create a testing garden with buried items to understand how depth affects ID accuracy.
The more familiar you become with your specific detector’s responses, the fewer good targets you’ll miss in the field.
When in Doubt, Dig it Out (Especially Initially)
As you begin your metal detecting journey, resist the urge to rely heavily on discrimination settings.
While it’s tempting to filter out all that “junk,” those early targets provide invaluable education about your detector’s language.
When exploring new sites, dig more targets rather than fewer.
Each recovered item—whether a pull tab, bottle cap, or coin—teaches you to correlate specific signals and ID numbers with actual objects.
This hands-on experience builds a mental library that’s far more valuable than any manufacturer’s guide.
The “Wiggle Test”
When good signals suddenly deteriorate or transform into iron grunts upon rescanning, you’re likely encountering the classic “masking effect” that frustrates many detectorists. This happens when valuable targets lie close to iron objects, creating confusing signals that high discrimination might miss entirely.
The wiggle test can help you identify these masked targets. Instead of relying solely on your first scan, try approaching the target from different angles while slightly wiggling your coil. Listen carefully for any brief, clean tones among the iron sounds. This technique helps separate mixed signals and reveals good targets hiding near iron.
Don’t immediately dismiss a target that changes tone during rescanning. These inconsistent signals often lead to valuable finds that others have missed by relying too heavily on discrimination settings.

Consider “Iron Audio” or “Tone Roll”
Modern detectors equipped with Iron Audio or Tone Roll features provide a significant advantage in discriminating between targets. Rather than completely silencing rejected targets, these features allow you to hear iron objects with distinctive low tones while good targets produce higher, clearer tones.
When you’re hunting in trashy areas, don’t miss out on this valuable tool. By enabling Iron Audio, you’ll get audible feedback about iron near potentially valuable finds that might otherwise be masked. This extra information helps you make better dig-or-skip decisions in the field.
The ability to hear what you’re discriminating against, rather than experiencing silence, gives you a more complete picture of what’s beneath your coil. You’ll quickly learn to recognize complex target signatures that indicate valuable items among iron trash.
Don’t Be Afraid of Iron (Sometimes)
While Iron Audio features help you identify unwanted ferrous trash, there’s an important distinction to make: not all iron is junk.
On historical sites, iron artifacts can be valuable discoveries that tell important stories about the past.
Before you set your detector to ignore all ferrous signals, consider the context of your search location. Are you hunting at a colonial homestead, battlefield, or ancient settlement? These places might contain historically significant iron tools, weapons, or structural components worth recovering.
Instead of completely rejecting iron targets, try using a more selective approach. Dig a few iron signals occasionally to calibrate your understanding of what might be hidden below.
You’ll develop better discrimination skills and might uncover important relics that less patient detectorists would miss.
Use Notch Sparingly
Notch discrimination represents one of the most powerful tools in your detector’s arsenal, but it’s a double-edged sword that requires restraint.
While tempting to notch out every nuisance target you encounter, this approach can backfire dramatically.
When you create excessive “notches” in your discrimination pattern, you’re essentially punching holes throughout your detection spectrum. These gaps don’t just eliminate trash—they create blind spots where valuable targets might hide. A coin with similar conductivity to a notched-out pull tab will remain silent in your headphones.
Instead, limit your notching to specific, consistent junk items that repeatedly waste your time in a particular hunting location.
This strategic approach maintains detection integrity while filtering the most problematic trash, ensuring you’ll still hear those unexpected treasures that make metal detecting worthwhile.
Conclusion
As you fine-tune your discrimination settings, you’ll find the sweet spot between filtering trash and finding treasure. Don’t overdo it—high discrimination may cost you valuable finds. Remember, notch discrimination gives you precision control for specific targets. Test your settings in different conditions, and you’ll quickly develop the perfect balance for your hunting style and location.
Author Profile
Piotr Lesniewski
"Digging up the past, one signal at a time."
Polish-born, Scotland-based, and obsessed with the beep. My passion began decades ago, exploring fields with my Dziadek (grandfather). Now, with over 10 years of digging under my belt, I'm here to share everything I've learned—unfiltered and unbiased—to help you unearth your own piece of history. No sales pitches, just real field experience.